 ChessPigeon
A shared chessboard for coaches and students
Teach chess online with ChessPigeon's shared chessboard. Create a classroom, send students the invitation link, and review positions together using moves, arrows and chat. Students join in their browser with just a name.
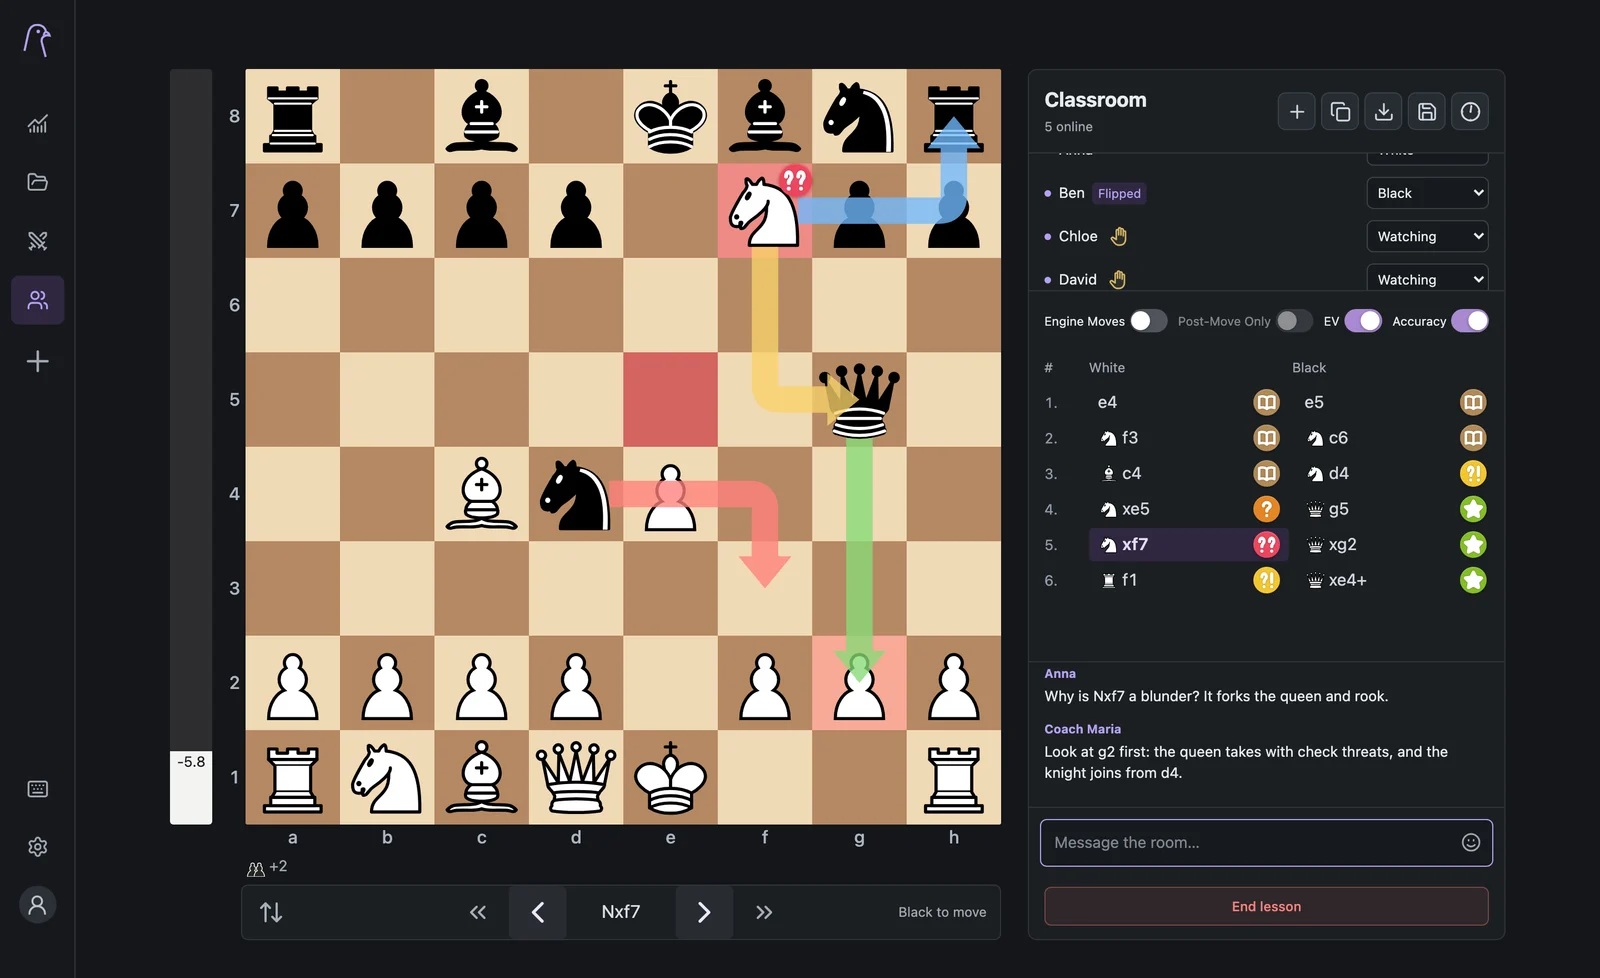
A lesson in progress
Why a shared board
Teach the position, not the screen share
Screen sharing shows a picture of a board. In ChessPigeon everyone is on the same board: you move the pieces, your student answers on it, and nobody has to read coordinates out loud.
Everything a lesson needs sits beside the board: the people in the room, the moves with their labels, the engine switches and the chat. Students only need a browser and the link you send them.
- One position for everyone, kept in sync live
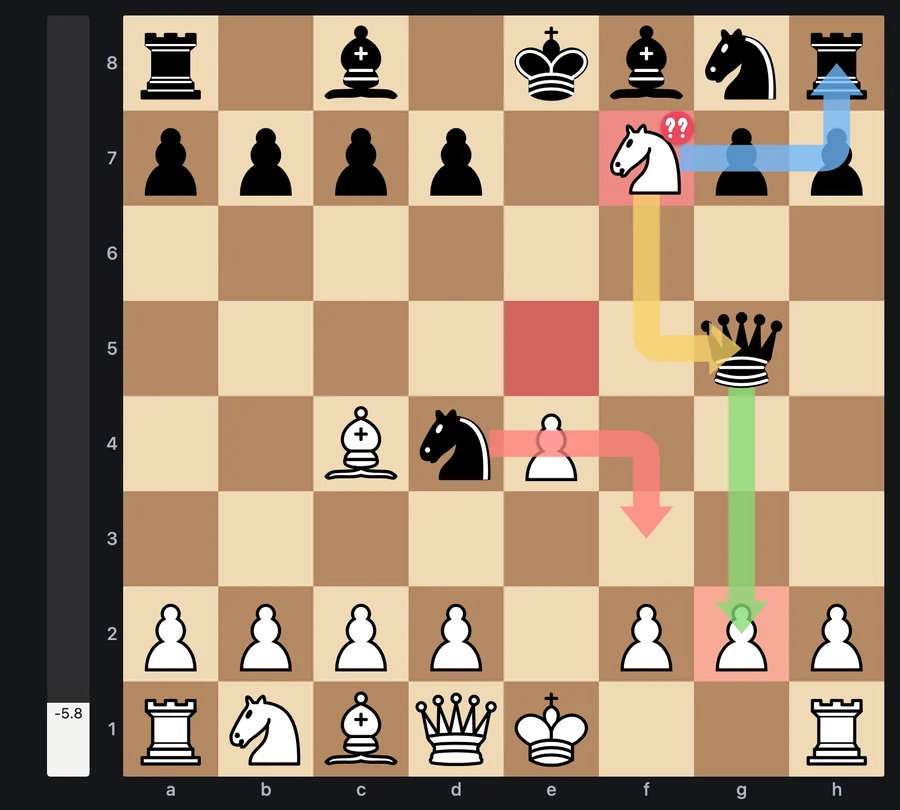
- Shared arrows and highlights in four colours, stored with the lesson games
- Optional evaluation bar and move labels, turned on by the coach
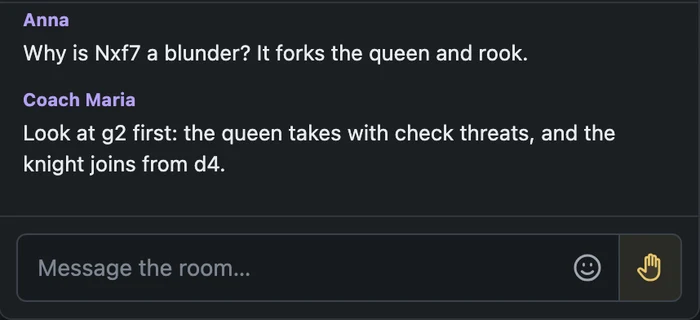
- Chat with emoji, clickable links and a raise-hand button
- Import a PGN, FEN or Chess.com games into the lesson
- Save or download every lesson game, at any time
Who it is for
Online lessons, clubs and study partners
Coaches running one-to-one or small group lessons, club trainers going through a game with their team, and friends who want to look at a position together.
A lesson can hold up to 50 participants. The coach decides who may move, so a group can watch while one student plays White and another plays Black.
Nothing has to be installed. The lesson runs in the browser on a computer, tablet or mobile device, and the engine runs only in the coach's browser.
Invitation walkthrough
How can I teach chess online?
Create a classroom, copy its invite link and share it with your students. Follow the first lesson guide for board controls and permissions.
Create the classroom
Open Classroom, type Your name and press Create classroom. The lesson starts from the initial position, ready for you to play moves or import a game.
Copy the invite link
Use the copy button (Copy invite link) at the top of the Classroom panel and send the link to your students by email or message.
Students join
They open the link, type their name and press Join classroom. They appear in your participant list straight away and see your board.
Who is in the room
See everyone at a glance
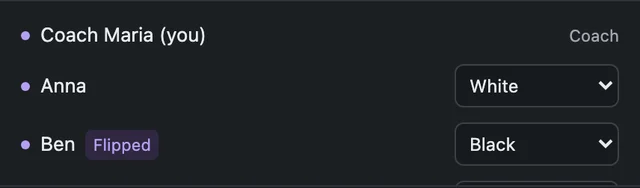
The top of the Classroom panel counts how many people are connected, for example 5 online. Below it, every participant has a row with their name, a status dot and their role.
- Status dots are lit for people who are connected. If someone closes the lesson or loses their connection, their dot turns grey.
- Roles are changed from the menu at the end of each student's row. A student playing Black gets a Flipped badge, because their board faces the other way from yours.
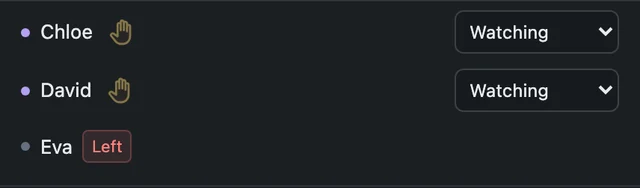
- Raised hands appear as a hand next to the student's name, and you hear a short sound. Select the hand to lower it once you have answered.
- Students who leave stay in the list, greyed out with a Left label, so you can see who has gone.
Roles
You decide who controls the board
Everyone joins as Watching. Change a participant's control from the list at any time, as often as the lesson needs: give one student White for a game, then hand the board to someone else for the next exercise.
| Control | What the participant can do |
|---|---|
| Watching | Follow the board, chat, add emoji, raise a hand, flip their own view, save and download. Cannot move or draw. |
| White or Black | Move only that colour and draw shared arrows. Their board turns to face their colour. |
| Full board | Move both sides, step through moves, explore variations and import or switch lesson games. |
| Coach | Everything above, plus the engine switches, the session timer, permissions and ending the lesson. |
Position setup
Arrange an exercise with the piece drawer
Open the left-pointing arrow handle on the right edge of the lesson panel to add, remove or freely move pieces. The drawer slides out from the border to the left. It is available on wider screens; it is hidden on mobile devices with narrow screens.
While the drawer is open, students see Coach is editing. They can pick up pieces, but attempted moves snap back and make the message briefly blink coral. Using another Classroom button, including Import games, closes the drawer before continuing. You can also close it with its arrow. Incomplete or illegal positions stay paused until the coach corrects them.
Grabbing a board piece turns the drawer’s inner piece area red and shows a trash icon. Drop the piece there to remove it, or release it elsewhere to leave trash mode. Editing starts a new position in the current lesson game. If it already has moves, the original game is kept as a separate copy. New game in the import dialog adds a standard starting position while keeping your previous games. Clean Board removes all pieces for an empty setup.
Read the position-editing steps, including how to keep a legal position ready for saving.
Arrows and highlights
Draw your ideas in four colours
Right-drag from one square to another to draw an arrow, or right-click a square to highlight it. Hold a key while drawing to change the colour, so each idea gets its own meaning:
| Colour | How to draw it |
|---|---|
| Green | Right-drag |
| Red | Shift + right-drag |
| Blue | Ctrl or ⌘ + right-drag |
| Yellow | Alt + right-drag |
Drawings appear on every board in the room at once. They belong to the position they were drawn on and are saved with the lesson game, so they come back when you step to that move again and are kept when you save or download the games.
The coach and students playing White, Black or Full board can draw. Student drawing pauses while the coach edits a position. Watching students see the drawings but can't add their own.
Engine help
Stockfish, only when you want it
Four coach-only switches add engine help for the whole room. They all start off, so students think for themselves first. Stockfish runs in the coach's browser, and everyone sees the results the coach turns on.

- Engine Moves
- Shows the engine's best-move arrow and its top lines for the current position.
- Post-Move Only
- With Engine Moves on, keeps the best move hidden until a move has been played. Ideal for "find the move" exercises.
- EV
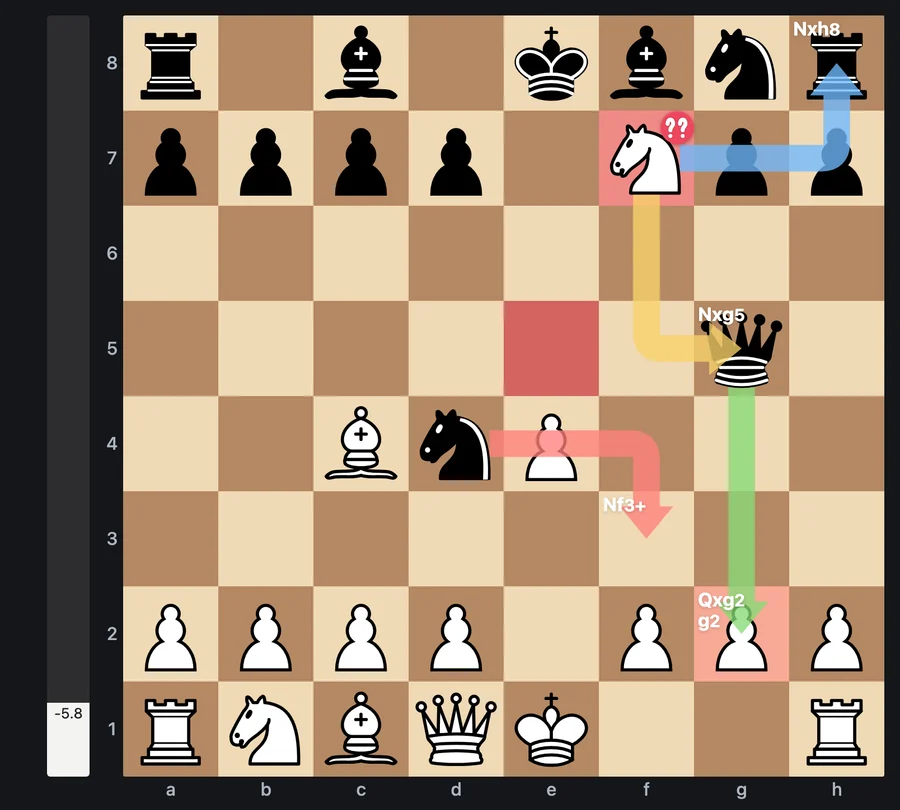
- Adds the evaluation bar beside the board. The number is in pawns from White's side: -5.8 means Black is almost six pawns ahead.
- Accuracy
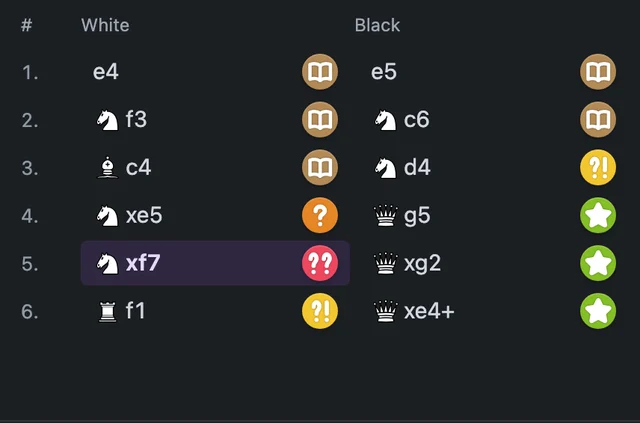
- Labels every move in the list and marks the moved piece on the board: Brilliant, Book, Best, Excellent, Good, Inaccuracy, Mistake or Blunder.
The student's side
Ask, answer and follow along
Students see the same board, arrows, labels and chat as the coach. The engine switches stay visible but locked, so everyone knows what is turned on.
- Chat: type in Message the room… and press Enter. Links become clickable, and the emoji button adds an emoji to your message.
- Raise hand: the hand button sits next to the message box. Once raised it turns yellow and shows Wait for coach to respond; only the coach can lower it.
- Sounds: a short sound plays for new chat messages, and for the coach when a hand goes up. They follow the Move sounds setting.
- Leaving: students can select Leave classroom at any time. Coming back through the link joins them again as a new participant, starting as Watching.
Session timer
Keep the lesson on time
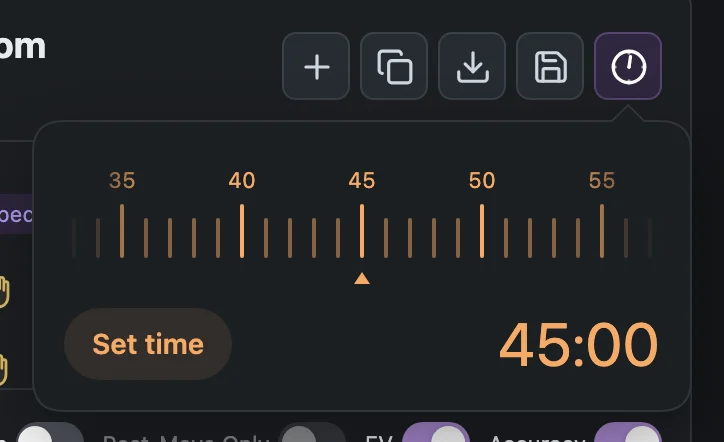
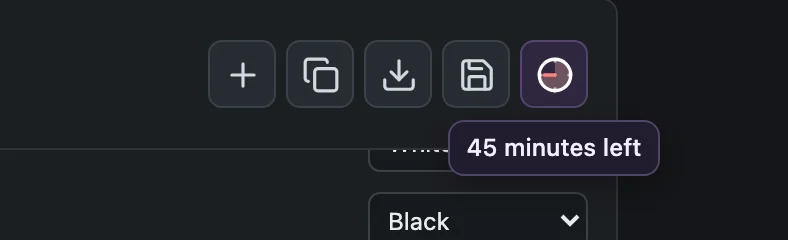
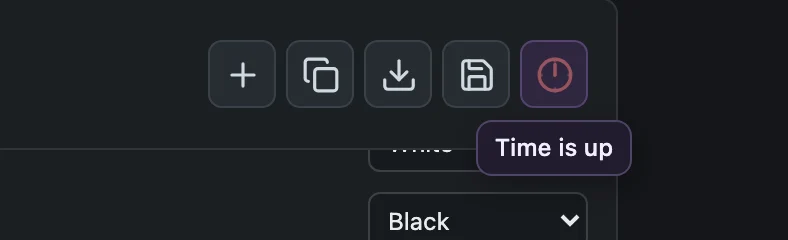
The clock button next to Save shows how long the lesson has been running: its hand turns once an hour, and hovering shows the minutes so far. The coach can turn it into a countdown at any time.
Make it yours
Every participant chooses how the board looks
Settings are personal and saved in each person's browser. Changing them never changes the lesson for anyone else, so a student can pick the board and pieces they find easiest to read.
Board and pieces
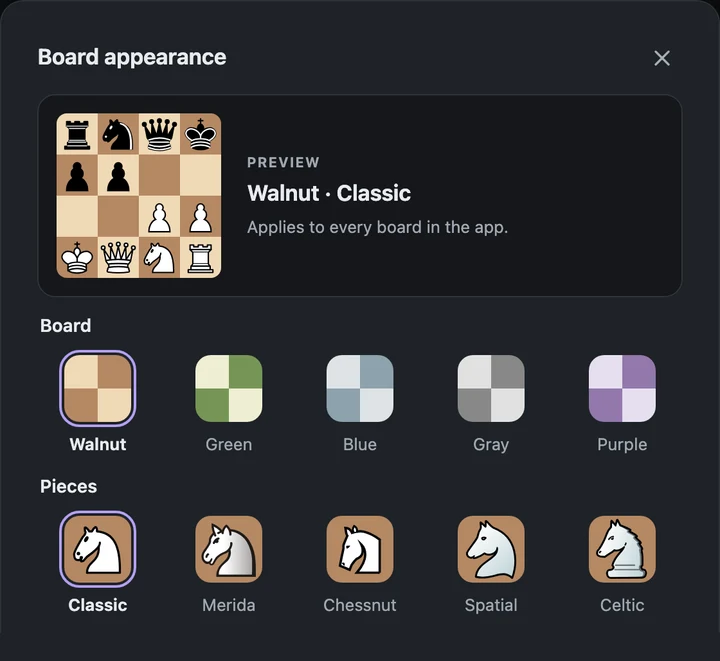
Choose the board colours and piece set you read most easily. The preview updates as you pick, and the choice applies to every board in ChessPigeon, not only the lesson.
- Six boards: Walnut, Green, Blue, Gray, Purple and Sage.
- Six piece sets: Classic, Merida, Chessnut, Spatial, Celtic and Eel.
- Engine: the same window holds the analysis depth and number of engine lines. In a lesson, the coach's choices apply.
Arrows and colours
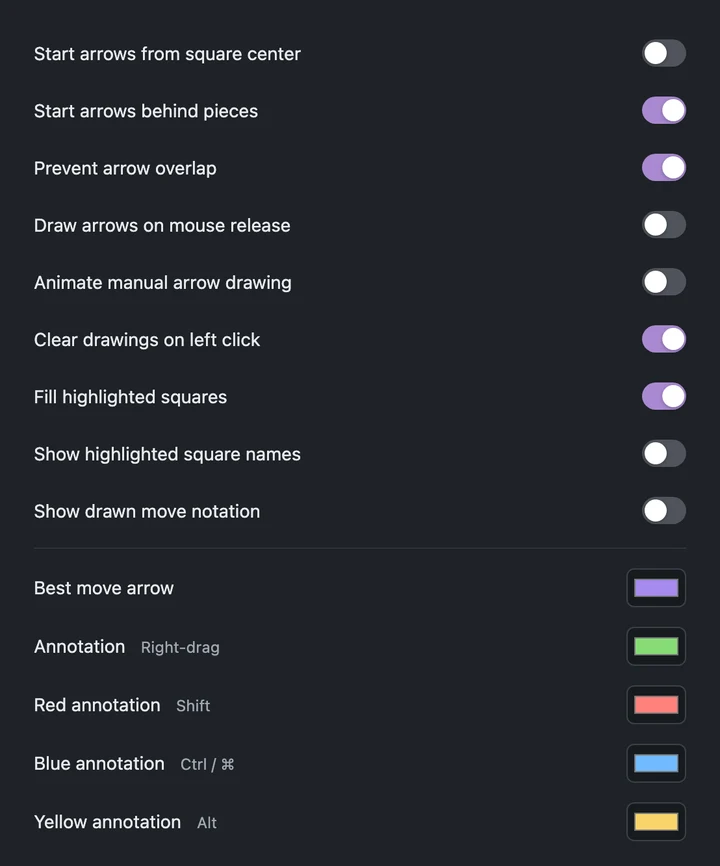
Arrows & drawings decides how drawing feels on your board: whether arrows start from the square centre or behind the piece, avoid overlapping, appear as you drag or when you let go, and whether a left-click clears them.
You can also pick the exact shade of each drawing colour. A red arrow stays red for everyone in the room; you only choose which red you see.
Label every arrow and square
Two switches in Arrows & drawings add text to the drawings on your own board, which helps when a lesson gets busy or a student is still learning the square names.
- Show drawn move notation writes the move each arrow stands for, such as Qxg2 or Nf3+.
- Show highlighted square names names every highlighted square.
Both are off by default, and turning them on doesn't change what anyone else sees.
Before your lesson
The practical details
- Lesson length
- A classroom closes six hours after it was created, whatever is happening. Plan longer sessions as two lessons, and save the games before the end.
- Stay in the same tab
- Your seat belongs to the browser tab. Reloading keeps it; opening the link on another device joins as a new participant who starts as Watching. The coach role cannot move to another device.
- Keyboard
- Anyone can press F to flip their own board. With full control of the board, ← and → step through moves for the whole room, and Shift + ← or → (or Home and End) jump to the first or last position.
- Group joining
- If many students join at once from one school or club network, ask them to join a few at a time.
- After the lesson
- Choose End lesson to close it for everyone. The coach can't leave a lesson any other way. Games and drawings stay available to download. Saving and Open in Analysis require legal positions; the latter appears once the lesson has ended.
Help
Related instructions
Your first classroom
Create a lesson, invite students, share control, use the timer and end the lesson.
Read the steps →Review a game with your coach
Prepare a game and questions, then work through it together.
Read the guide →Troubleshooting
What to do when a student cannot join or a lesson disconnects.
Fix a problem →Your next lesson is one link away
Type your name, create the classroom and send the invitation. Your student only needs a browser.