 ChessPigeon
Running Your First Classroom Lesson
Before your lesson
- Use one tab for the whole lesson. Your coach seat belongs to the browser tab where you created the lesson. Reloading it is fine; opening the link in another tab, browser or device joins as a new participant.
- Treat the invitation like a key. Anyone who has the link can join, so send it only to your students and don't post it publicly.
- A lesson lasts up to six hours from the moment you create it, and then closes without a warning. Save the games before then.
- Up to 50 people can be in a lesson at once, and a lesson can hold up to 50 games.
- Prepare your material. Have the PGN of the game you want to discuss ready to paste, or know the Chess.com username to import from.
Create the lesson
- Open Classroom in the sidebar, or press C.
- Type the name your students will see in Your name, for example “Coach Maria”.
- Select Create classroom. The lesson opens with a fresh board in the starting position.
- Select the copy icon (Copy invite link) at the top of the Classroom panel and send the link to your students by email or message.
You can start teaching straight away: play moves on the board, or import a game first (see Teach on the shared board).
How students join
- The student opens the invitation link in their browser.
- They type their name in Your name and select Join classroom.
- They appear in your participant list straight away and see your board, including any moves, arrows and chat messages from before they joined.
If you have already ended the lesson, the link shows that it has ended before asking for a name.
See who is in the room
The top of the Classroom panel shows how many people are connected, for example 5 online. The list below it has one row per participant, with a status dot, the name and the role.
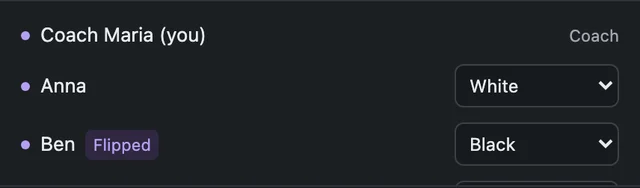
- Connected or not: a lit dot means the person is connected. If someone closes the lesson or their connection drops, the dot turns grey after about 30 seconds. They keep their seat and come back to it when they reload the same tab.
- Flipped: each person can turn their own board with the flip button or F. A Flipped badge shows who is looking from the other side compared with you.
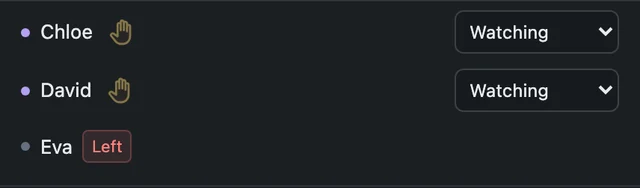
- Raised hands: a hand icon next to a name means the student is waiting for you. Select it (Lower hand) once you have answered.
- Left: a student who used Leave classroom stays in the list, greyed out with a coral Left label.
Share control of the board
Students join as Watching. Use the menu at the end of a student's row to change what they can do. You can change roles as often as you like, for example to let a different student play each exercise.
| Role | What they can do |
|---|---|
| Watching | Follow the board, chat, add emoji, raise a hand, flip their own view, save and download the games. They can't move, draw or change the position. |
| White or Black | Move only that colour and draw shared arrows. Their board turns to their side automatically. |
| Full board | Move for both sides, step through moves, explore variations, import and switch games. |
| Coach (you) | Everything on the board, plus the engine switches, the timer, roles and ending the lesson. |
Teach on the shared board
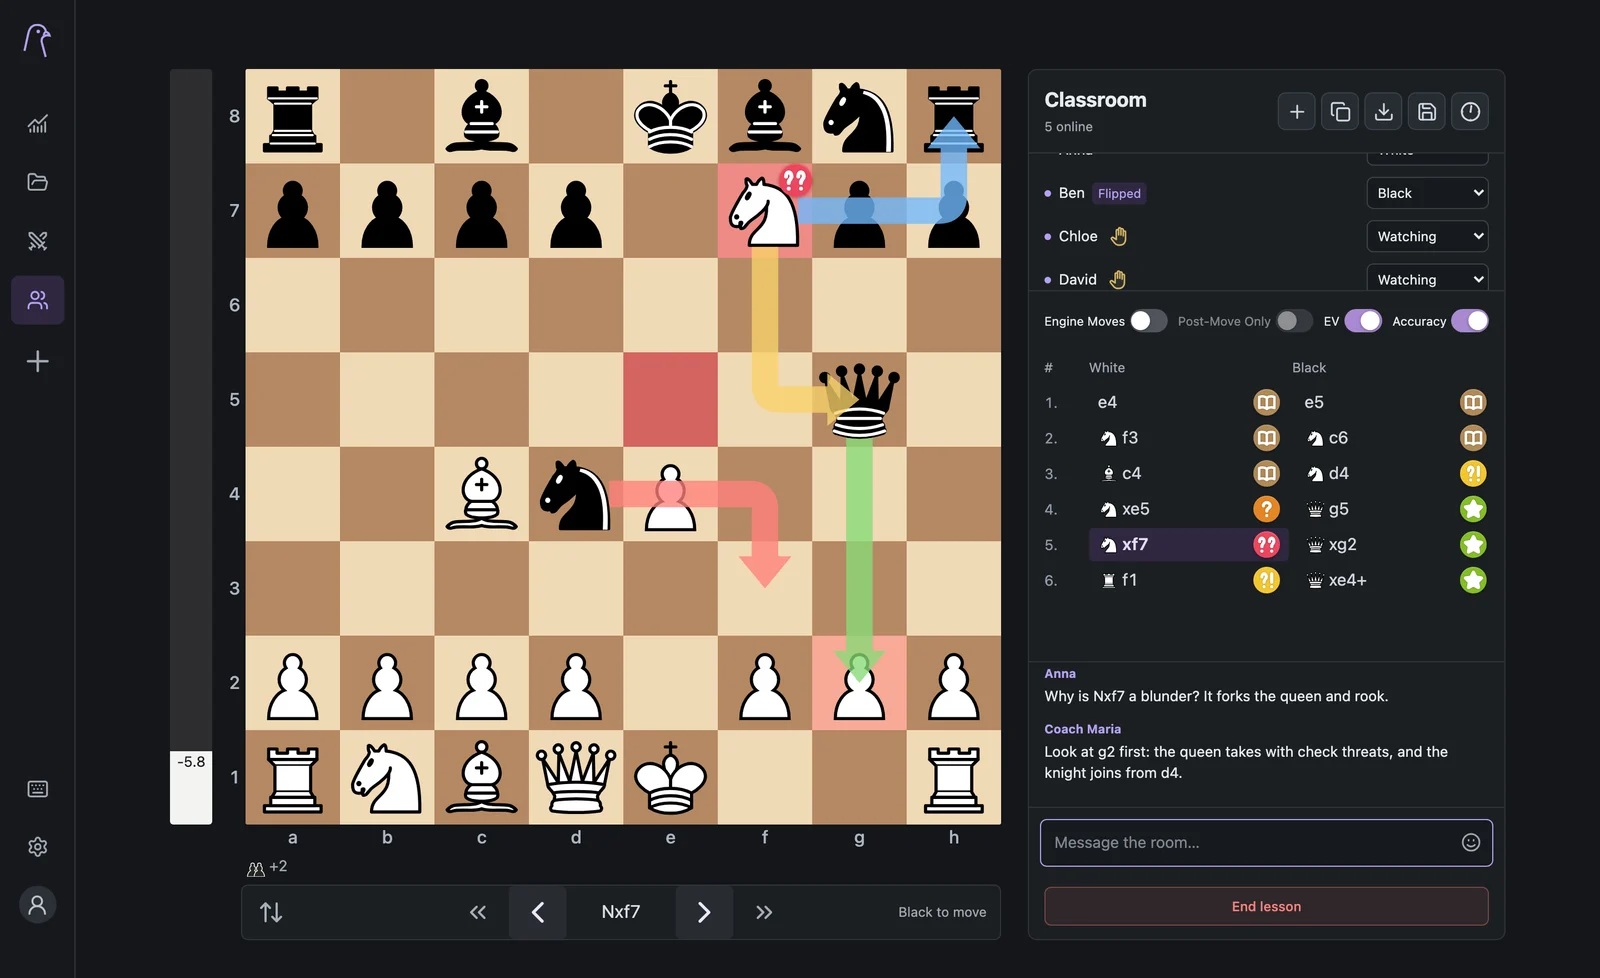
- Moves: everyone sees the same position. A move played from an earlier position becomes a variation, listed under the moves.
- Stepping through a game: select a move in the list, or use ← and →. Shift + ← or → (or Home and End) jump to the first or last position. The keys work for you and for students with Full board control, and the whole room follows.
- Load a game: select Import games (the first toolbar button) and paste PGN or FEN, or find Chess.com games. A lesson can hold up to 50 games and 500 KB of PGN. When there is more than one game, a menu above the engine switches lets you move between them.
Set up a position
- On a wider screen, use the left-pointing arrow at the right edge of the lesson panel. The drawer opens to the left; use the right-pointing arrow to close it.
- Drag a drawer piece onto the board to place it. Grabbing a board piece turns the drawer’s inner piece area red and shows a trash icon: drop it there to remove it, or onto another square to move it freely.
- Clicking another Classroom button closes the drawer first. You can use Import games to import another game, choose New game for the standard starting position, or Clean Board for an empty board. New game keeps your previous lesson games.
- Close the drawer when the position is ready, or use another Classroom button. Pending edits finish before the drawer closes and that button continues.
Students see Coach is editing instead of whose turn it is. They can pick up pieces, but drops snap back. Attempting a move briefly blinks the message coral (steady coral with reduced motion). The coach cannot play ordinary moves while editing. Chat and personal board flipping still work.
A missing king, a pawn on the back rank or another illegal setup leaves play and engine help paused. Correct it before saving the lesson or opening the position in Analysis. PGN download remains available.
Reloading the coach tab restores editing mode. If closing fails, reconnect and try again. On a narrow layout where the drawer is hidden, use Finish editing to release the board; return to a wider screen to arrange more pieces.
Draw arrows and highlights
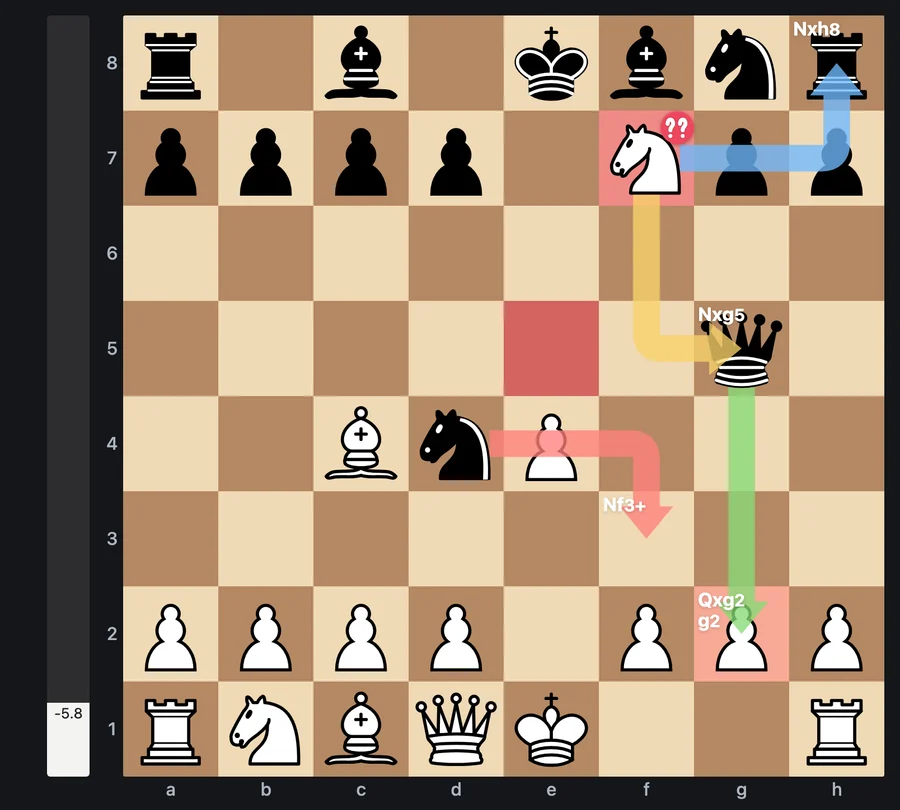
Right-drag from one square to another to draw an arrow, or right-click a square to highlight it. Hold a key while you draw to pick a colour. Many coaches give each colour a meaning, for example green for the move played, red for threats and blue for ideas to consider.
| Colour | How to draw it |
|---|---|
| Green | Right-drag, or right-click a square |
| Red | Shift + right-drag or right-click |
| Blue | Ctrl or ⌘ + right-drag or right-click |
| Yellow | Alt + right-drag or right-click |
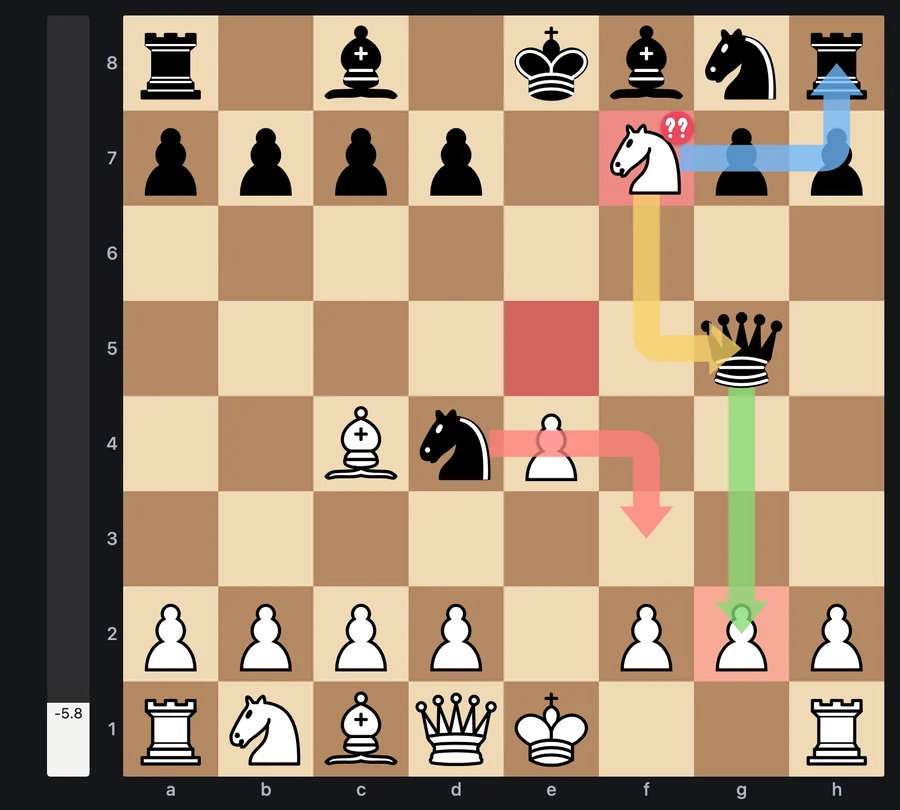
- Drawings appear on everyone's board immediately and are saved with the position, so they return when you step back to that move.
- Draw the same arrow or highlight again to remove it, or draw it in another colour to change it. With the default settings, a left-click on the board clears the drawings.
- You and students playing White, Black or Full board can draw. Watching students see the drawings but can't draw.
Turn on engine help
Four switches under the participant list add engine help for the whole room. Only you can change them, and they all start off. Stockfish runs in your browser, not your students', and everyone sees the results you turn on.

- Engine Moves shows the engine's best-move arrow and its top lines for the current position.
- Post-Move Only (with Engine Moves on) hides the best move until a move has been played, so students can try to find it first.
- EV adds the evaluation bar. The number is in pawns from White's side: +1.5 means White is ahead by about a pawn and a half, and -5.8 means Black is almost six pawns ahead.
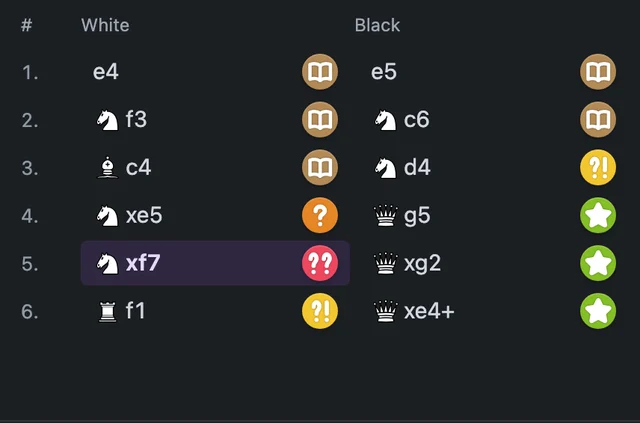
- Accuracy reviews the game and labels every move: Brilliant, Book, Best, Excellent, Good, Inaccuracy, Mistake or Blunder. The label also appears as a badge on the piece that moved.
Chat, raised hands and sounds
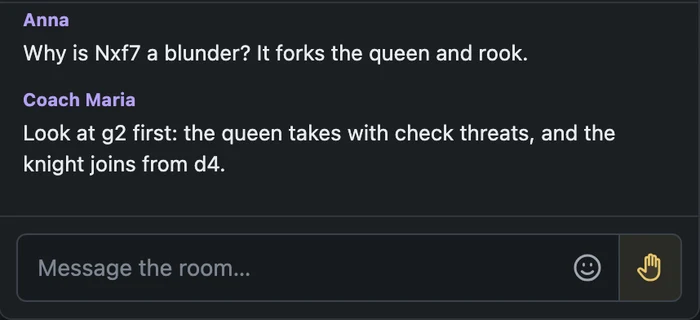
- Send a message: type in Message the room… and press Enter. Messages can be up to 2,048 characters. Web links become clickable, and the emoji button adds an emoji to your message. The chat keeps the latest 100 messages.
- Raise a hand: students select the hand button next to the message box. It turns yellow and shows Wait for coach to respond. Students can't lower their own hand; you lower it from the participant list.
- Sounds: a short sound plays when a new chat message arrives, and you hear one when a student raises a hand. Sounds follow the Move sounds switch in Settings → Sound & tooltips. Some browsers only play sound after you have clicked somewhere on the page.
Use the session timer
The clock button next to Save shows how long the lesson has been running. Its hand turns once an hour, and hovering over it shows the minutes so far. To turn it into a countdown:
- Select the clock. A small picker opens with a minute ruler, starting at 15 minutes.
- Scroll the ruler (one minute per step, or ten while holding Shift) or type the minutes, from 1 to 360.
- Select Set time. The countdown starts immediately, whatever time has already passed.
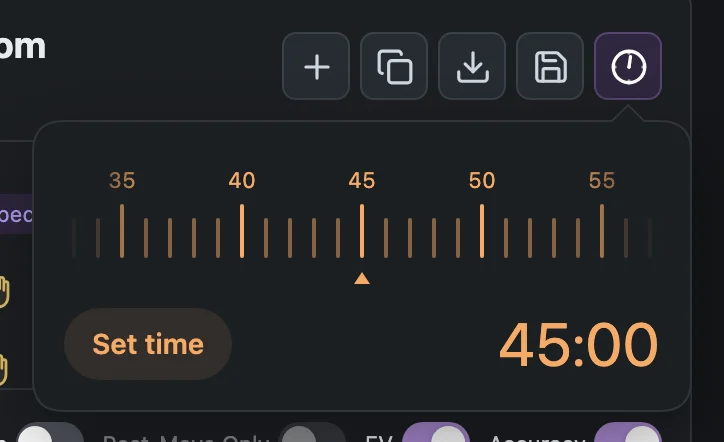
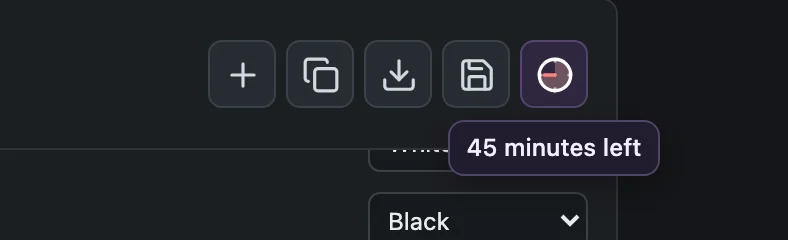
While it runs, a coral slice on the clock shows the time remaining and hovering shows the minutes left. Your students see the same clock, but only you can change it.
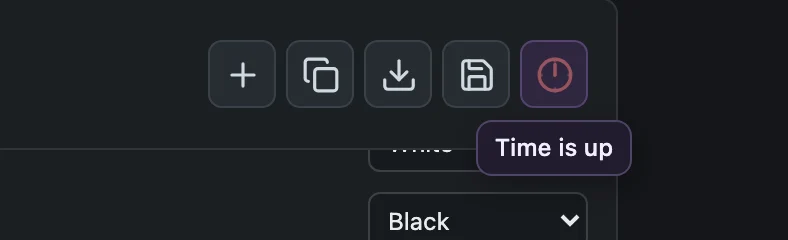
At zero, the clock turns coral and pulses gently, its tooltip says Time is up, and you hear a short three-note alarm. Students don't hear it. The lesson stays open until you end it.
- Set a new time at any point to start a fresh countdown.
- Choose 0 and select Reset to go back to showing elapsed time.
- Ending the lesson stops the timer.
Personal display settings
Settings change only how ChessPigeon looks on your own screen; they never change the lesson for anyone else. Each student can choose their own.
- Board appearance: six board colours and six piece sets, with a live preview.
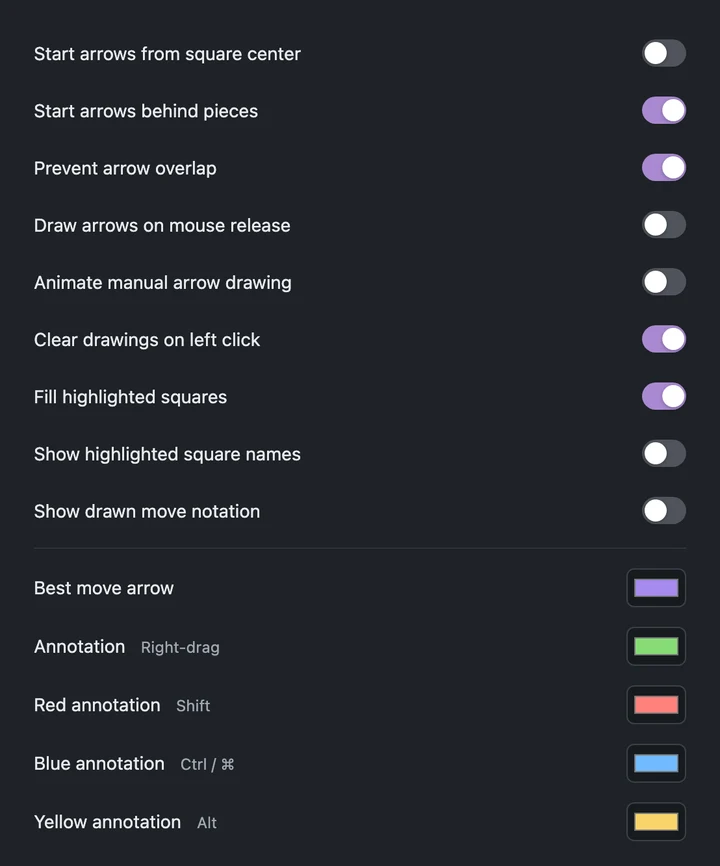
- Arrows & drawings: where arrows start, whether they avoid overlapping, whether a left-click clears drawings, and the shade of each of the four drawing colours. A red arrow stays red for everyone; you only choose which red you see.
- Drawing labels: Show drawn move notation writes each arrow's move next to it, and Show highlighted square names names highlighted squares. Both are off by default.
End the lesson and keep the games
- Anyone can download PGN before or after the lesson ends. Save lesson games to library requires every lesson game to have a legal position. Arrows and highlights are kept in the saved games.
- When you're done, select End lesson, then End lesson for everyone. As the coach, this is the only way to leave the lesson.
- Everyone sees Lesson ended and the status dots turn coral. Chat closes, and an Open in Analysis button lets each person continue studying the selected game on their own, at the current position.
Students can leave earlier with Leave classroom. If they come back through the link, they join again as a new participant with the Watching role.
Common problems
- “Too many requests. Please try again shortly.” Many students joining from one school network at the same moment can hit a safety limit. Ask them to join a few at a time, a minute apart.
- “This classroom is full.” The lesson already has 50 active participants.
- “This classroom has expired.” If the board is still open, save or download its games before leaving. A room that disappears before expiry says it is no longer available. Missing or expired links open the new-classroom page directly.
- I lost my coach seat. A coach seat can't be moved to another tab or device. Create a new classroom and send the new link.
- A student's dot is grey. Their connection dropped or they closed the tab. Ask them to reload the same tab; opening the link somewhere else joins them again as Watching.
- I can't hear the alarm or chat sounds. Check Move sounds in Settings and click anywhere on the page once, because browsers block sound until you interact.